So here we are, back for the final installment of this nightmare. I have to say that I'm glad for that. It seems like it's been a long road. Hell, it's been almost a full year since it happened now.
I’ve always wanted to relocate the blower. It has always been mounted to a bracket that was bolted to the starter. There was an inlet hose that dropped into the bilge. An outlet hose then ran to a 3” PVC pipe that was glassed into the hull which ran to the transom. It seemed like every time I did anything on the back end of the engine the blower or the hoses were in the way and I had to remove it which was a PITA. Hell, checking the tranny fluid could be a lesson in futility.
This is an old engine pic showing the blower location.
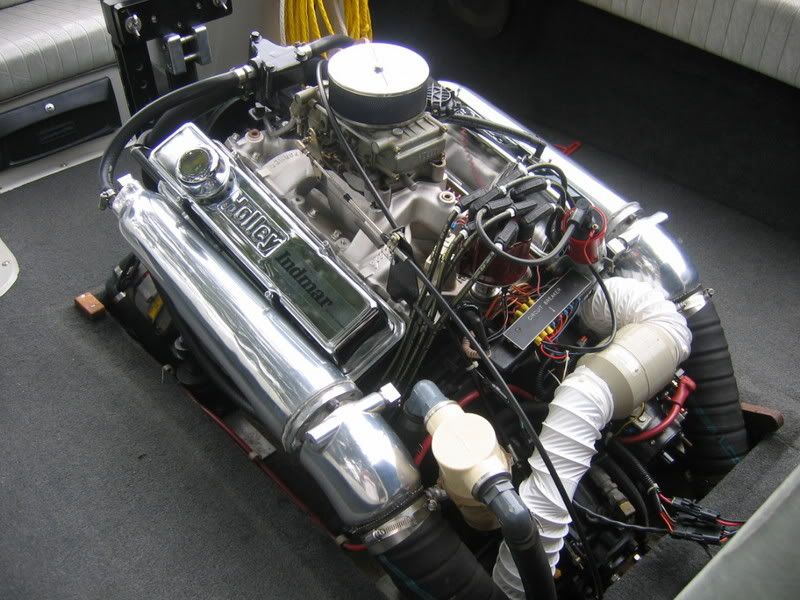
You can see the PVC pipe between the exhaust and the shaft log. Every time I had to remove the center floor section you can’t help but step all over it which caused twisted ankles, bruised knees and bloodied knuckles.
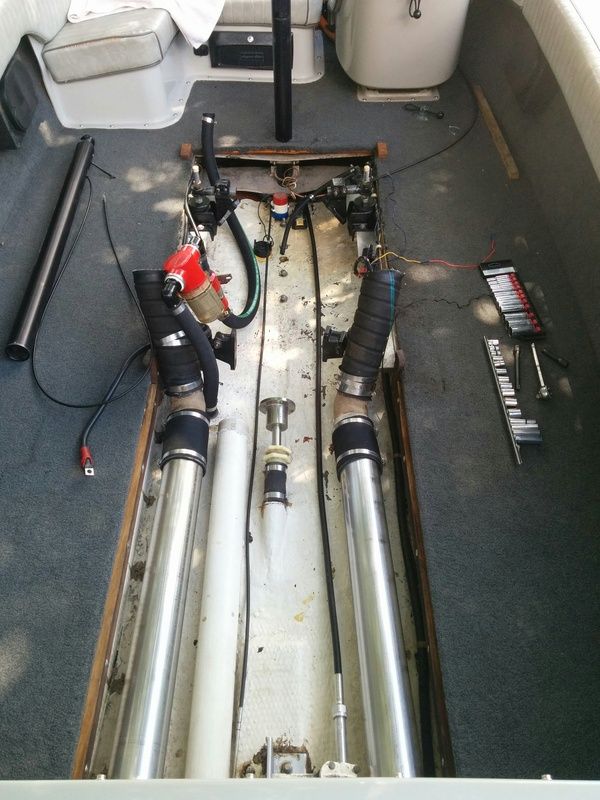
Ron knew exactly what I’m talking about and he relocates them underneath the rear floor access between the stringers in his restorations right where that PVC pipe was. I wanted to do the same thing so I removed it and ground out the final remnants of it before painting the bilge.
But how do you put it back in the same place that was a known issue and eliminate the previously mentioned problems? It has to be removable….No, it has to be easily removable. So I can get it out of my way before working back there.
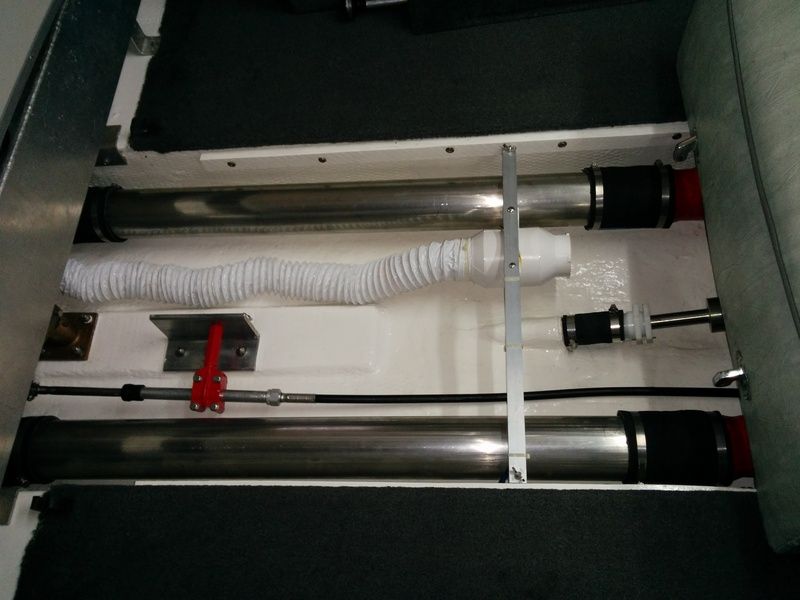
The aluminum flat stock uses wing nuts to bolt it to small aluminum angle brackets that are screwed to the stringers. The blower wiring has quick disconnects right at the stringer so I can remove the whole thing and lay it off to the side with the flex hose still attached in a minute or two. It’s still very functional like this. I'm not exactly sure how Ron does his but this works for me.
So now we’re finally down to what caused this whole mess in the first place. You remember this thing:
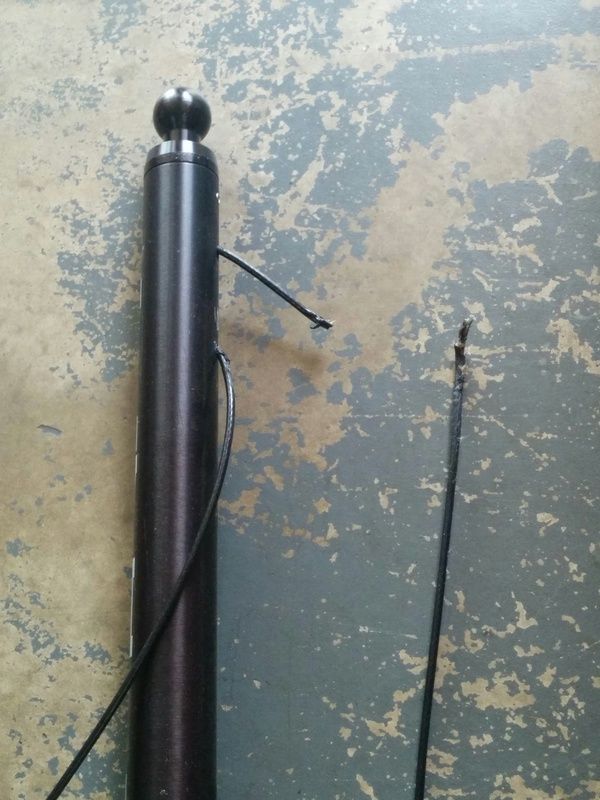
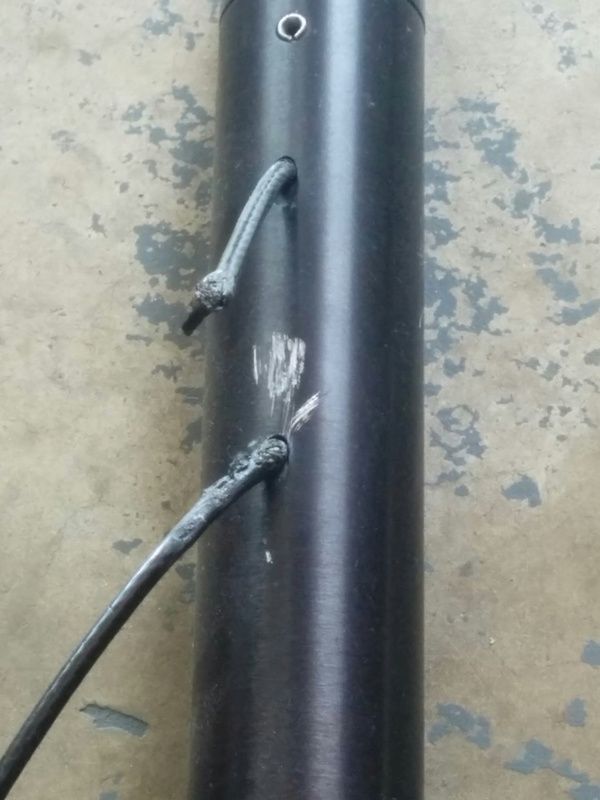
When the pylon hit the bridge, the top cable was cut clean up near the pylon. The lower cable of the pylon snapped at the loop down at the cable clamp and that broken cable then pulled through the clamp block. The clean cut shown here is what I did to remove the cable clamp from the turnbuckle. The frayed end is where the lower cable snapped.

I had Rob Bemman put new cables on this. They were 3/16” like the old cable but the sheath was much thicker. I mistakenly thought the factory cables were only 1/4” but they aren't. I wanted to get rid of that POS clamp block. They work but they’re virtually impossible to get adjusted properly and if you’re working with one that was used on another boat the problem is only exacerbated with kinked cable and scathed sheathes from previously clamped cables. Just not a good alternative.
A couple years ago I had one of my boom cables break at the loop that attaches to the carabiner at the bow. This was caused by cables that weren't adjusted properly. One cable was basically doing all the work (The factory turnbuckles were aluminum frame/steel screw which had seized and I couldn't get them adjusted properly) which caused the sheath to split, which in turn caused the cable to rust, which in turn caused it to break. BI makes probably the strongest boom and extended pylon out there but cables are terminated without thimbles and clamped without stripping the sheath so I did it the right way...SS turnbuckles, SS cable thimble w/ferrules properly terminated and plasti-dipped with a couple of quick links. It's so much cleaner this way and it just has to be stronger.


The new ones are red sheath too to match my boom cables…bonus. All SS hardware and all properly adjusted. The way it should be.

So all I have to do yet is slide a new shock tube over the turnbuckles to cover up all my work again and this sucker is done. Put an end to this snowballed, out of control repair. I’m out boys. See you on the water…LOL

