Author Topic: 86 Barefoot Skier Stroker build  (Read 28092 times)

0 Members and 1 Guest are viewing this topic.

Offline backfoot100

  • Hero Member
  • *****
  • Posts: 446
  • Eddie
  • Boat Make/Model/Year: 86 Barefoot Skier
86 Barefoot Skier Stroker build
« on: January 30, 2012, 08:05:18 PM »
Hey guys. My first post on this site but I thought that you might be interested in seeing the results of my latest project. Before I get into that it would probably be a good time to give you a little background into me and my baby.
Just so you're prepared, I want to let you know that I'm really proud of it and everything I've done over the years, so you might as well grab one of your favorite adult beverages, your reading glasses, get really comfy and you might get somewhat entertained. For you guys in the north, it'll be a couple months before you come out of hibernation anyway so you got plenty of time to kill right? So go get ready and let's get started.

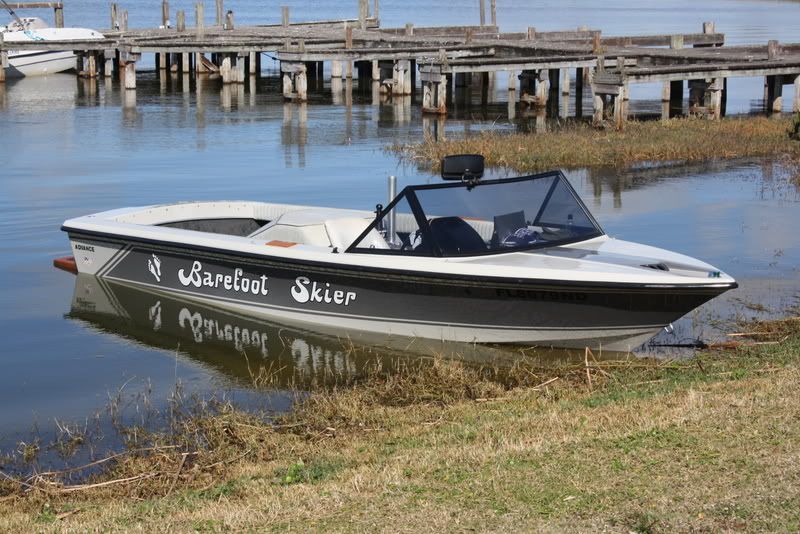
I bought my boat way back in '92 after I had skied behind several tournament inboards and fell in love with each and every one of them in some way or another. I am the third owner and when I got it there were around 300 hrs. on it. When I started to look for a boat I only two prerequisits:
1) I wanted something that was different. Namely, not a Correct Craft or Master Craft. Not that they're bad boats by any means. On the contrary, both are really well made very good boats. Whenever somebody gets a boat or any new toy for that matter, what's the first thing that the owner does to it? They personalize somehow to make it unique to any other machine out there. Well I've always been a bit of a rebel so I wanted to start out with something unique.
2) I wanted it to have a Chevy engine. Again, not that Ford is bad. I've been more of Chevy guy my whole life and I just get so tired of everybody asking if it's a 351 Ford. Like that's the defacto standard or something!!! Please. That rebel aspect of my nature is rearing it's ugly head again. Sorry if you're a Ford freak but you're probably not going to enjoy this post too much then.

Anyway, I found this beauty and never looked back. You know the old adage about the two best days of your life.....the day you buy your boat and the the day you sell it......yuk, yuk. Or you know what BOAT stands for...Break Out Another Thousand.......Yeah, yeah, laugh it up fuzzball!!!!! I've heard 'em all just as I'm sure you have.
I now have 1300 hrs on the clock and every minute that I've put on it has been pure pleasure. I've taught my daughter, family, friends and even perfect strangers some form of watersports over the years. Skiing, wakeboarding, kneeboarding, barefoot, wakesurf and even the dreaded tubing. I'm predominantly a barefooter myself and I've taught several dozen people the sport after learning what not to do. This latest project has put it out of commission for three years. My ski partner has a '80 CC Ski Nautique that we used during the old girls decommissioning so it's not like we were without a boat during that time.
My daughter couldn't wait to get it back on the water and at one time told me that some of the best times in her life were when we were together in that boat. Another friends daughter (whom I taught to barefoot when she was eight years old) came to visit us after being gone to college for a year. She said she almost started crying seeing that boat sitting in the driveway and instantly recalling the many memories it brought back. How can you put a price on something like that? Now, I have grandbabies (4 and 2.5 yr. old twins) that I just started teaching to ski. Needless to say, I'll do whatever I have to and spend as much as I need to ensure that I can pass lifelong memories onto them.

Over the last several years I've been quite active at CorrectCraftFan.com. For those of you not familiar, it's a forum very similar to this for CC fans. Even though I don't own a CC, they have accepted me very openly and several of them have stayed at my house, been present at my dinner table and skied with my boat. My current ski partner I met through that website and I've been to several of their reunions. The knowledge base there is nothing short of phenominal and if there is anything that you might want to learn about tournamnet inboards, that's a pretty good place to start. I also know that Ron and Dan here are extremely good and very knowledgeable when it come to AS boats. I had a couple different phone conversations with Ron when he was the owner of the company even though he probably doesn't remember and Dan has spent some time on the CCFan website providing help to others. Even though I have never personally met either one, I have nothing but the utmost respect for them. That being said, I thought that I would try and share some of my experiences with those who are fellow American Skier owners.

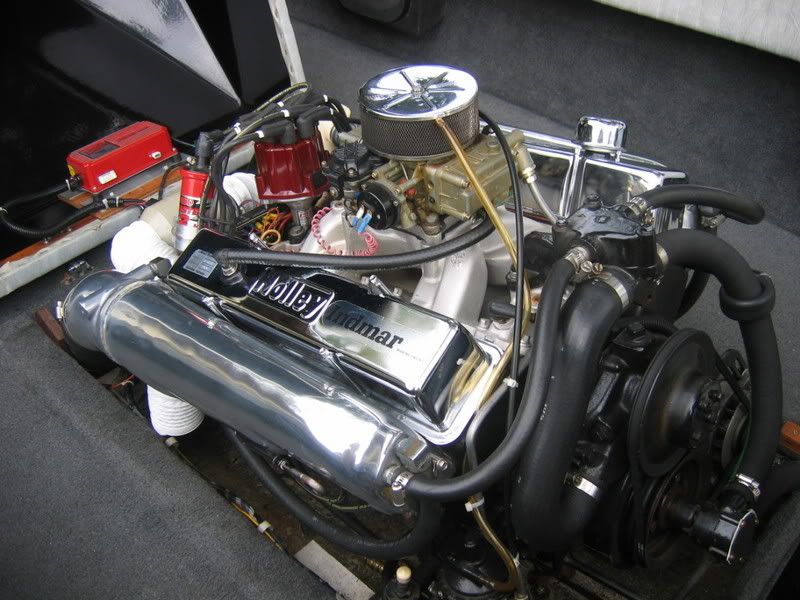
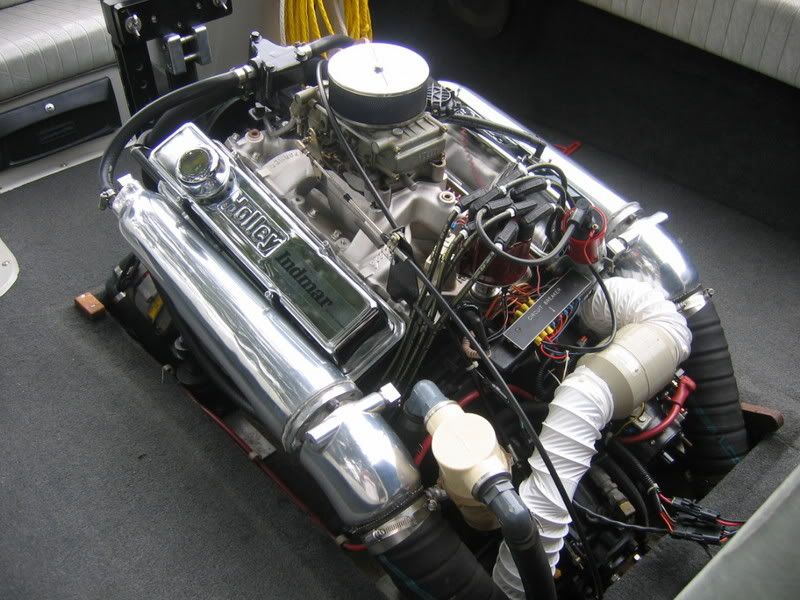
Back about 12-13 yrs. ago I replaced the floor and carpet. I treated everything with CPES (clear penetrating epoxy sealer) so if I did everything right, I shouldn't have to do that again. So far, the floor is as solid as the day I installed it. I also had a cracked head (common for a SBC) so I replaced the stock heads with a set of World Products Torquer II's that I pocket ported and gasket matched to an Edelbrock Performer Air Gap manifold. I also wanted to upgrade to electronic ignition so I put a MSD marine distributor in at that time also. I did some polishing of the exhaust manifolds and have always been very proud whenever the cover was lifted.

So here's a couple of ticklers to what I'm starting with before I kick off the new project.


Yes, this is with almost 1300hrs. on the clock.


So what about this project? Back around feb. of '09, I had some of my wife's family down here and we were enjoying some water time. Her nephew was pulling me on a nice long footin' run and when I dropped off, I heard this real bad knocking sound coming from the boat. I could hear it from 200' away while I was floating in the water. It was one of those sounds that makes your heart sink. The oil pressure and temp were all good so I told him to keep it running. It was coming from the bottom end and was consistant with crank rotation. It definitely wasn't valve train. It wasn't missing or idling rough either. Except for the knock, everything felt and looked perfectly normal. So after idling for a couple minutes, the knock mysteriously vanished. I shut it off and turned it back on several times and it still sounded perfect. The oil was topped off with no signs of water in it. We ran it back to the trailer and loaded it up. The next day, I changed the oil and fired it up in the driveway and again, everything was normal. I took it to the lake the next weekend and as soon as I fired it up, the knock was back. It was now time to tear into it and see what was going on.

Ever since I've had my baby, I always said that whenever it came time to rebuild, I wanted to stroke it to 383. I figured it was the perfect time to do that right? Unfortunately, two weeks later, I had to take almost a 20% pay cut to keep my job, but hey, I still had a job and insurance. We were still OK for paying the bills but there was nothing extra for building a stroker. I quickly realized, there was no way that I was going to be able to do much of anything without some help, so I got a second job bartending. So now I'm starting to save some money for my new project and I also start researching what I really want to do to it.

Now keep in mind that I know enough about engines to be dangerous. I've done the aforementioned things but I've never attempted anything like this. I have learned a lot from the CCFan forum but until you actually do something like this, you never really understand what's involved. I knew that I was in for a real learning experience but at the same time I was determined to do this myself. I started reading books, articles, websites and pretty much everything else I could get my hands on. I had pretty much all the tools I needed but I was still going to have to acquire some specialty items that I didn't have. Things like an engine stand, blast cabinet, a hoist of some sort. I would also need some specialty tools like a tapered ring compressor, degree wheel and several different precision measuring tools just to name a few. As you have probably figured out by now, this was going to be a marathon and not a sprint.

Stay tuned guys. I promise things will get interesting before I'm done.


When people run down to the lake to see what is making that noise, you've succeeded.

Offline backfoot100

  • Hero Member
  • *****
  • Posts: 446
  • Eddie
  • Boat Make/Model/Year: 86 Barefoot Skier
Re: 86 Barefoot Skier Stroker build
« Reply #1 on: January 31, 2012, 03:14:44 AM »
I thought that I would add a little more before work.

I knew that I needed a lift but I didn't want one that would take up more floor space. I knew that a cherry picker has it's limitations for getting a motor over the gunnel. I live in a quiet neighborhood and just couldn't be hanging an engine from a tree with a block and tackle. So I had to put my redneck engineering skills to work and figure out an alternative. If I was going to be building a motor in my garage, I also needed better lighting. A lot of it. I'm not getting any younger you know and the lookers are getting tougher to do my cypherin' without good light. This is what I came up with:

This has the lights on.


The I-beam spans the whole width of my garage. I just happened to get really close color matching with some rustoleum spray paint from Lowes.


The free trolley that I acquired after some sandblasting and a coat of paint as well as the Habor Freight chain hoist.


I found out that I have 2x8 joists in the garage ceiling. The centerline of one joist is directly above the centerline of the I-beam. I figured that a single joist wouldn't be very sturdy so I had three seperate three foot pieces of I-beam cut. I have them set at 90 degrees to the main beam and resting on top of the joists in the attic so they span across three joists with the center of the three the one that the main beam is mounted under. I cut holes in the top flange of the main beam and the bottom flange of the cross beams and bolted them together with 3/4" threaded rod. My thinking is that the main beam being attached along the bottom of a single joist would spread the load along that whole length of joist instead of straining it from a single point. Then the cross pieces additionally spread load to the joist on each side of the main from above. I know it's probably very confusing to envision. I was expecting to get all kinds of creaking, cracking and popping from the joist when I first put some weight on it. I didn't hear even a whisper of strain on the joists. The trolley also works perfectly. I can raise the engine, roll it over and mount it to the stand or drop it into the back of my pickup without breaking a sweat. It also worked awesome for just holding up the back end of my ski partners motor while we pulled the tranny out to get rebuilt. It turned out better than I ever expected. A really nice start to the project. Harbor Freight and Wholesale Tool were my best friends during this project. I also found some really good deals on Ebay for some of my special needs.

I finally have the pieces in place to tear the engine out and start disassembly. I've been working my ass off for a year now and getting my engine fund built up after numerous setbacks like tires and brakes for both of my vehicles, a new sand filter for my pool, and the numerous tools as well as the above mentioned hoist and lighting that I figured I would need for the project. It also gave me the time to do my reasearch for the parts and pieces that would be going into this beast.

So let's get into this!!!! After I bought my baby way back in '92 I knew that this motor was pretty hot for the day. I contacted Indmar and the tech that I talked to there told me that the engine was advertised at 290HP but in reality, it was every bit 300 ponies. Indmar only made about 50 of these bad boys a year for a four or five year run in the mid to late eighties. I know that you guys are sharp when it come to this cool stuff so you know that a typical SB (Ford or Chevy) in the '86 time frame was running 245-260HP. A few options might have been running up to the 285HP range. This was, to my knowledge probably the hottest factory optional SB a person could get in that era and really didn't get challenged until the GT-40 burst upon the scene in '93 if I remember right. I must say that this engine did always run really well. I completely enjoyed every minute listening to that thing purr. I guess you really don't know what you have until you tear it down though. The numerous books I read up on confirmed the horror stories of guys who purchased what they thought were 500HP crate motors. After they were installed and hooked up to a chassis dyno, they find out that monster 500HP motor is actually 350HP at the wheels and in reality maybe a true 400-425HP motor.
When I tore this thing down, I found out it really was well put together. I have no doubts now that it probably was what they said it was. 4 bolt mains, forged crank, windage tray, double roller timing chain with iron gears and a 650CFM carb. Add in the very cool aluminum exhaust manifolds and you have a pretty hot ticket by today's standards, let alone 1986! The timing gears and chain had virtually no wear on them. You guys also know that you just don't get a forged crank in any motor. After seeing this you can't imagine how tempted I was to just bore it 30 over and turn this thing into a very hot 355CI for some very reasonable scratch. So what the F**K went wrong????
Well, as I was tearing it down, I spun the rotating assembly and I couldn't find any indication of a problem. There was no binding, banging, tight spots or anything to indicate a problem. The bearings looked good to me but I really didn't know what I was looking for either. Number 4 main bearings had a blueish tint to them indicating things were getting a little hot. Some minor scratches in a couple bearings indicated some foreign matter of some sort but the oil pan had absolutely no shavings of any kind in it. I finally got the crank and pistons removed and I found this:


Yup, that's number 6 piston and rod. It has good movement until you get out to the outer limits of the pin/rod range of movement and then it tightens up like this. Number 6 is attached to the same main bearing that was tinted blue. Guess I found the problem. The piston skirt had to be slapping the s**t out of the cylinder. What I don't understand is how or why it happened. Any speculation from those of you who know better, I'm all ears. By the way, all of the cylinders were within a few ten thousenths of each other except number 6. That one was a few more ten thousenths larger but it was really nothing serious at all.

Stay tuned. This is just starting to get good now.


When people run down to the lake to see what is making that noise, you've succeeded.

Offline RonT

  • Administrator
  • Hero Member
  • *****
  • Posts: 1202
    • RonTanis
  • Boat Make/Model/Year: American Skier/Eagle V-25/2001
Re: 86 Barefoot Skier Stroker build
« Reply #2 on: January 31, 2012, 08:10:16 AM »
Well I'm impressed, your the type of A/S owner I enjoyed building boats for! One of the reasons I retired from new boat production was the demographic change our industry has seen. It has changed from the curious DIY'ers & proud owner/skiers who kept their toys tuned & clean to the next generation that craves complex overpriced ski boats & have no idea where the dipstick is, much less why we have one.
Please tell me there is an adequate stop at the end of your I-beam
Boat is missing its rubrail, if you are in need I have them available
Without being there & inspecting the parts check that wrist pin, may be bent
Get it ready for the reunion

 
Call anytime
Ron T.
985-542-4336

Offline backfoot100

  • Hero Member
  • *****
  • Posts: 446
  • Eddie
  • Boat Make/Model/Year: 86 Barefoot Skier
Re: 86 Barefoot Skier Stroker build
« Reply #3 on: January 31, 2012, 09:10:26 AM »
Thanks Ron.
I appreciate the comments. Coming from you that means a lot for sure.

Yes, I do have hardened 5/8" bolts at each end of the I-beam for trolley stops.

I do have the rub rail. I hope to get into that tonight. Patience Grasshopper.

When people run down to the lake to see what is making that noise, you've succeeded.

Offline phil

  • Gernal Forum Moderator
  • Hero Member
  • ***
  • Posts: 574
    • amskierboats.com
  • Boat Make/Model/Year: 2008 Moomba Outback DD
Re: 86 Barefoot Skier Stroker build
« Reply #4 on: January 31, 2012, 10:15:00 AM »
Wow, awesome story, awesome boat!

Offline RonT

  • Administrator
  • Hero Member
  • *****
  • Posts: 1202
    • RonTanis
  • Boat Make/Model/Year: American Skier/Eagle V-25/2001
Re: 86 Barefoot Skier Stroker build
« Reply #5 on: January 31, 2012, 10:45:37 AM »
Rubrail Tips: When reinstalling rubrail be sure to do the following:
Tighten every hull/deck joint screw, repair as needed (I think we used #10 machine screws w/ locknuts every 3-4' on that model)
Inspect caulk between hull/deck joint, replace as needed, this is the primary seal
Caulk after rubrail is installed on the bottom side as secondary seal
 

Offline Mike Harry

  • Captain
  • Hero Member
  • *****
  • Posts: 1042
  • 1986 American Skier Barefoot Skier
Re: 86 Barefoot Skier Stroker build
« Reply #6 on: January 31, 2012, 02:37:03 PM »
Its about time you posted here. Ive seen you lurking......

I got your message yesterday. Id love to come look at the old girl, but mine crapped the bed on me last weekend. I threw a rod. Not really in the "good" boat mood right at this point in time.

Ill get back with you real soon though, thanks for calling. (also working 16 to 18 hour days have limited me on what I can do lately)

Offline backfoot100

  • Hero Member
  • *****
  • Posts: 446
  • Eddie
  • Boat Make/Model/Year: 86 Barefoot Skier
Re: 86 Barefoot Skier Stroker build
« Reply #7 on: January 31, 2012, 04:19:31 PM »
Its about time you posted here. Ive seen you lurking......

I got your message yesterday. Id love to come look at the old girl, but mine crapped the bed on me last weekend. I threw a rod. Not really in the "good" boat mood right at this point in time.

Ill get back with you real soon though, thanks for calling. (also working 16 to 18 hour days have limited me on what I can do lately)


Yes, I've been lurking but that has been due to working two jobs and trying to finish this thing. It should make more sense after I finally get thru to the point I'm at right now.
Sucks about the engine. Believe me, I feel your pain. Hope to talk soon.

When people run down to the lake to see what is making that noise, you've succeeded.

Offline Mike Harry

  • Captain
  • Hero Member
  • *****
  • Posts: 1042
  • 1986 American Skier Barefoot Skier
Re: 86 Barefoot Skier Stroker build
« Reply #8 on: January 31, 2012, 04:23:47 PM »
Ahhhh, $1200 for a factory L31 shortblock (factory new block crank rods and pistons) is not a huge deal. Its a setback for sure, but I could be trying to bilge that joker out from the bottom of the lake too...........

If anything Ill have to jump on the bike and slide bye sometime when we can work out a schedule.

Offline backfoot100

  • Hero Member
  • *****
  • Posts: 446
  • Eddie
  • Boat Make/Model/Year: 86 Barefoot Skier
Re: 86 Barefoot Skier Stroker build
« Reply #9 on: January 31, 2012, 05:00:33 PM »
So, now I need a machinist. That was a chore in itself. After you get a little knowledge and get an idea what you want to accomplish, a 30 second conversation on the phone with a perspective machinst to trust with your motor will tell you if you hit paydirt or Billy Bob's small engine repair shop. That took me about a month to find one that I felt comfortable with. Mike Ford Racing Engines just outside of Orlando. He wasn't very quick but I didn't need him to be and he was probably a little more expensive than some others but he is good. There is no doubt in my mind. I wouldn't hesitate to use him again. He also confirmed that the number 4 bearing had gotten warm but the block was in real good shape. He also checked over the stock crank to see if that was in good shape and reusable. It was. He asked if I wanted to sell it to him but I have a feeling I could use that in the future???? You think????

So here are some of the goodies that I was putting in.

Old vs. New


6 of the 8 jugs


I decided on a Eagle forged crank. After all why would I go backerds to a cast crank when I have a forged crank in there to start with? I also went with 6" H-Beam rods and Mahle forged pistons. The whole rotating assembly according to Eagle is rated for 750HP. Probably overkill for this application but I wanted a strong bottom end. If I ever decide to bolt on some extra options in the future, I know the bottom end is stout enough to handle about anything I throw at it. I had a hard time determining Eagle, Scat or is there anything else I should be looking at. All my research said that it was really toss up between the two. My next option was going another $700-$1000 for a entry level Callies which just wasn't happening. I heard good and bad about both Eagle and Scat so I went with recommendations from trusted friends who had experience. I have absolutely no problems with my decision. I wouldn't hesitate to do it again. In '86 Chevy changed the RMS on the SB to a one piece unit. That change also mandated a change in the adapter on the flywheel flange that made it go from internal balance to external. I really wanted to keep it internal balance if at all possible. If I ever wanted to change the damper or the flywheel for whatever reason, I wanted to be able to just bolt it on instead of pulling out the entire rotating assembly to get balanced. Eagles documentation said that it could be balanced internally. Scat's ionformation said external ONLY. That was my final decision maker right there. My machinist was a little scheptical that it would be able to be done. With standard I-beam rods, no problem, but with 6" H-Beam rods he might be required to drill out the counerweights and add heavy metal to balance it internally. A very expensive operation. He was surprised that the assembly balanced. He said if it wasn't for the lighter Mahle pistons, he wouldn't have been able to do it. So now all he had to do was Zero balance my stock flywheel and I put a zero balance 8" Professional Products damper on the front end. We're on a roll now.

For the heads, I decided to go with iron instead of aluminum. I just feel that the aluminum haven't had a chance to prove their longevity over good old iron. A few guys at CCFan are running some very hot aluminum head setups that should get some indication of longevity but that could be some time yet.
I chose RHS Pro Action with 72CC chambers and 200CC runners. I did a home pocket port and gasket match on the intake and exhaust sides. Then I polished the chamber roof of each cylinder. I figure that I have about 30 hrs. with die grinder working on those things. It's not hard as long as you have the tools but it is very time consuming. After that I had to take them back to Mike so he could shave off a few thousanths to fix my "oops". You will always have a oops or two when you do this. The Eagle catalog says that with my rod/piston combination and 76CC chambers you should have 9.7:1 compression assumming a .040" headgasket. With the smaller 72CC chambers and the fact that Mike had to shave .010" off the deck to true that up and that the heads were cut .003" this should be at 10:1 or even a little higher. Mike CC'd the chambers but I didn't calculate the total compression ratio so it's just an educated guess. It should be really close though. I had some really nice pics showing the different stages of the porting but our camera fell in a puddle and lost them before I could download. Bummer.

So here is the crank and block. Notice how the edges of the block were machined out for the crank and rods to clear the block. The oil pan needs to be able to do that same thing.


Now for the cam. This is a standard rotation engine so I wasn't limited by some of the same issues you guys get into. I decided to retrofit this to hydraulic roller lifters and cam. Being my first real build, I decided that I wouldn't try and get a custom grind. I figured that there were probably thousands of hours of R&D and testing on about any engine combination you could think of so there had to a pretty good cam in someones catalog already. My research told me that I should probably be looking for something in the 270 degree duration range and 110 to 112 Lobe Separation Angle (LSA). The problem I had is that there really isn't a lot of documentation on selecting a marine cam so I had to make some educated guesses. In most applications, anything over 270 duration can start to have drivability issues. The peak torgue RPM generally starts to rise farther up the RPM band. A wider LSA will give a wider power band but you have lower overall peak HP numbers. A stock or aftermarket exhaust is also a pretty important factor in the cam you can get. I was planning on reusing my aluminum manifolds. I decided to go with a Comp cam because they had the best information on their marine specific grinds. They had a 270 that they stated was the biggest one recommended for a stock exhaust. Now what was their definition of a stock exhaust? A fairly constricting Merc or Volvo outdrive or a below the waterline open exhaust with a high performance aluminum manifold? The next one was a 276 that was recommended for jets and open exhaust? One thing that was consistant in several books that I read is that there are two common mistakes made by engine builders:
1) Too much cam
2) Too much carb
It is agreed by virtually everybody that to err on the small side is much better than the other way around.
So my cam specs are as follows:
Int. 270 degrees duration @.006" and 218 degrees @.050" 495 lift
Exh. 276 degrees duration @.006" and 224 degrees @.050" 503 lift
1500-5500 RPM range
112 LSA

I decide to stick with Comp for the entire valve train. Roller lifters, Magnum pushrods and Ultra Pro Magnum roller rockers. Everything fit really nice.

Degreeeing in the cam.


When people run down to the lake to see what is making that noise, you've succeeded.

Offline backfoot100

  • Hero Member
  • *****
  • Posts: 446
  • Eddie
  • Boat Make/Model/Year: 86 Barefoot Skier
Re: 86 Barefoot Skier Stroker build
« Reply #10 on: January 31, 2012, 06:03:14 PM »
On to the induction. I was planning on reusing the Performer Air Gap that I had but numerous people told me that a Stroker likes to breathe…a lot!!! So I upgraded to an RPM Air Gap. For the carb there is actually a mathematical formula for determining proper carb size. All you have to do is know the CID and how many RPM you want to run. A 383 running at 5500 RPM can only inhale 609CFM if my memory serves me right. My 650CFM carb should be more than sufficient for this application.
I called Holley to verify and they also concurred. I asked the tech about any jet change recommendations and he said I shouldn’t need any which surprised me. If the carb was properly jetted for the 350, having it bolted to a 383 is only allowing more air through it which in turn will then allow the jets to deliver more fuel based on the air demand. You shouldn’t have to change jets just because it’s going on a bigger motor. The key here is if it was properly jetted to start with.  It actually makes some sense when you think about it. I just never though about it in that way. I’m still gonna do some plug chops to make sure. I did rebuild the carb before I put back together.

Back down on the bottom end. The stock oil pan has a center drain on it with an EZ Drain adapter on it. That adapter happened to sit directly above one of the thru-hull studs from one of the tracking fins. I literally had .019” clearance between them since I’ve owned the boat. I checked the clearance with a feeler gauge every oil change to make sure everything was OK. That was always a little too close for my comfort so I wanted to change it now. In fact, when I removed the pan I found out that it was actually dented in from the adapter hitting that stud. I took a pic of it but it really doesn’t show the dent very well at all with the pan painted black. I found a Milodon oil pan that had a side drain and was supposed to clear Stroker cranks. Remember that the inside edge of the block is machined out for Stroker crank clearance (check the pic of the crank sitting in the block earlier). The oil pan needs to also clear that crank. This Milodon pan fits nicely and it also contains a built in windage tray. It’s a five qt. pan where the stock pan is six but I’ll still have 6 qts. with the filter. Plenty of oil available so I’m not concerned.


It was really difficult finding a pan. You wouldn’t think it would be a big deal. Most Stroker pans I researched were 7 qt. capacity and deeper than my stock pan so I was concerned about it fitting based on the clearance issues I had. I remembered a post somewhere along the line that the AS engine was placed as close to the keel as possible to maintain a lower center of gravity (CG). It also keeps the angle of the prop shaft down (or would that technically be a higher prop shaft angle?). Would that be a performance increasing feature? I wonder. Maybe Ron could enlighten us. The tranny and bell housing have a little less than a ½” clearance to the bottom of the bilge. My throttle cable runs underneath the engine and up to the carb from the back and it rubs in a couple places when sliding it around underneath the motor. That’s not a lot of room.
Now what about the oil pump? Standard volume, standard pressure is all that’s needed for these engines. A Milodon pickup would be properly fitted to their own pan so it only made sense to use a Milodon pump also. The nice thing about the Milodon pump is that the pickup has a tab on it that screws into the pump to make sure that the pickup doesn’t work itself out. It’s recommended that pickups be installed and then brazed to the pump body so they can’t work loose during operation. How bad do you think that would be to be running at 5K RPM and have the oil pickup tube drop out of the pump????? This Milodon unit just needed a couple drops of locktite and a screw installed for a much easier solution.

I was pre-assembling everything to verify that clearances and fitment of parts would not be an issue. You run into a snag, you fix it and move on. Then you tear everything apart, clean all the parts and pieces and then put it all back together permanently. Damn, this thing is taking a long time but I’m also being anal about it and not wanting to make mistakes that will cost me extra time and/or money.
T recap, I’m working two jobs and trying to split my free time between my wife, the honey-do list that every home owner has, the grand babies, skiing with my ski partner on Saturday mornings and this beast. By this time we're well into the two year mark. Time flies when you're having fun.

So this project is coming along pretty good. Slow, but pretty good.
For the exhaust manifolds, I just polished the areas that I could really get to without disassembly years ago. I wanted to remove the elbows and polish them like they should be. Might as well do it now right??? I never had any leaks in them but I thought that the elbow gaskets were 25 years old now and they won’t last forever so replace them while I have the chance and they should be good for my remaining time on this planet. You guys now know what my manifolds look like. They are really the pride and joy of everything that engine represents to me. I’ve never seen a set like them before and I would sacrifice additional performance to keep them. This build is sort of a hot rod…gear head….Katy bar the door….hide the women and children…sort of thing with high tech modern parts while keeping an old school retro flair. Cool S**T.

I have to admit that I was scared as hell to do this to the manifolds. I remove the four nuts and crack the first elbow and now there’s no turning back. I’m committed. All four nuts on each manifold came off easily and all four studs on each manifold are in really nice shape. I still need to remove the studs so I can face the ends of the logs properly before reassembly. I remove the first stud no problem. Then immediately snap off the next two studs in the first manifold. I didn’t try anything on the last one. OK, no big deal. Get out the EZ Out and promptly snap that thing off. Oh crap. So I don’t touch the other manifold at all which has all four studs intact. I take them to my machinist and explain what I’m trying to do and he says that he should be able to get them out with a little persuasion. After three weeks, he snaps off another EZ Out in one and he’s only able to remove two more. So I have three out of eight removed and two EZ Outs in the five remaining that are all snapped off at this point. 
So my machinist tells me about a place in Orlando that has some high tech machine that can still remove these with electrical current and water. I have since talked to others about it they knew exactly what I was talking about. Anyway, it has been a few years and he didn’t know if they were even in business anymore. He tried calling them, and they were still open and he explained what was happening and they say sure, bring ‘em over. They end up being able to get them out but they destroyed the threads doing it which normally doesn’t happen. They put heli-coils in and everything is good to go. Needless to say, I’m very relieved and will never take them apart again. Ever. Never. Ever Again. WHEW! That even made me start sweating recalling that trauma.
So now, I can start polishing these things. If you look way back at the pics of the original motor, you might see that the manifolds have a few waves to them. I end up filing and using some of my porting abrasives to smooth out these high spots, then sanding with 60, 120, 200 and 400 paper before I can start buffing out the metal with some of Eastwood’s buffing compounds and wheels. The elbows are completely awesome now that I got into the crevasses where they bolt together. I figure that I have about 40 hrs into the manifolds now.

I know that you guys have to be really tired of all this reading but grab a few more beers.

I test fit the manifolds to the heads and realize that the manifolds come out from the head and immediately turn up. It’s so quick that they hit the valve cover flange on the heads. Evidently the RHS heads have a bit taller valve cover flange area to help prevent leaking and the manifolds will never fit like this. After I saw this I went and looked at the old valve covers and I had done some trimming of the edges of the valve covers to fit around the manifolds when I installed the Torquer II heads years ago. I figure that I can find some spacers of some sort to do this right. I end up finding a set of 3/8” header flanges from a place online for like $30 each. I need another set of exhaust gaskets now too. The flange and both gaskets give me an extra ½” spacing from the head to the manifold but now I have a little bit more port matching to do. You can see in the pics what the flanges and exhaust manifold ports look like before and after the porting. This is exactly the same principle used on the heads that I lost the pics to. Everything ended up working out perfectly.

The exhaust gasses hitting these egdes are like hitting a brick wall


A better close up of the sharp edges


This is just so much more efficient


When people run down to the lake to see what is making that noise, you've succeeded.

Offline backfoot100

  • Hero Member
  • *****
  • Posts: 446
  • Eddie
  • Boat Make/Model/Year: 86 Barefoot Skier
Re: 86 Barefoot Skier Stroker build
« Reply #11 on: January 31, 2012, 06:31:38 PM »
OK, I’m finally pretty much done with the pre-assembly, so I tear it all apart, cleaned up all the parts and pieces and then did my final assembly. I decided to make some upgrades to the hull too. The original fiberglass mufflers are going to have to go. It was still pretty loud but certainly not like straight pipes. I opted to get a couple lengths of 4” stainless tube and replaced the mufflers. It originally had 4” round exhaust tips with flappers that I wanted to change out to something that was more deserving of the application. So I got some new 4” slant cut tips. When I removed the old tips I found that the gelcoat was really yellowed. I always thought that the gel was in pretty good shape all things being considered. There is no way that I can let this go, so I immediately removed all the hardware on the transom and had to get set up to start wetsanding, buffing and polishing the hull. I figured that I would at least do the transom now which has the most hardware that would have to be removed before I dropped the engine back in. Another thing that I was never expecting to do but once again…..now I’m commited. Just this one little setback cost me three weeks time.

I know this looks familiar to you guys


Hardware removed ready to start cleaning things up.


Wetsanded, buffed, polished and waxed


All back together but with some changes


I also decide to make a few changes onthe inside.
These were starting to show their age.


I had to replace the tach a couple years before I tore it down. I figured that the day would come that I would have to replace all the gauges so now seemed like a good time.


This is much better.


When people run down to the lake to see what is making that noise, you've succeeded.

Offline backfoot100

  • Hero Member
  • *****
  • Posts: 446
  • Eddie
  • Boat Make/Model/Year: 86 Barefoot Skier
Re: 86 Barefoot Skier Stroker build
« Reply #12 on: January 31, 2012, 07:12:42 PM »
So where do I stand right now? I'm in the process of wetsanding, buffing, polishing and waxing the entire hull. That's why the rub rail is off right now. I need to remove the windshield yet to get to the dash and I need to remove the decals. A definite work in progress but it's looking pretty good.

So what about the engine? Well I have it running and I must say. Freakin' AWESOME is what comes to mind. I've got about 6 hrs on it now and haven't run at WOT for more than 20-30 seconds at a time until I get a chance to do some plug chops and verify that it's jetted right. I haven't even GPS'd it yet. I do know that when you get on it, it sets you back into the seat pretty good. By the time you check the oil pressure and the temp, the tach says 5700 RPM and both speedos are pegged. This is with a POS federal 13x12 prop rebuilt and repitched to 13x13. I'm definitely going to do some prop testing and can't help but think a new CNC prop should wake it up even more. Needless to say at this point I have a really hard time not getting a woody every time I fire it up.


I know that I’ve kept you guys in suspense for long enough. Take your time. Enjoy. After you have a chance to take all this in, I'll post some video and you'll get a chance to hear it. Very cool.


If you look back at the original engine pics, you'll see the wavy finish on the manifolds. They look much cleaner now and you can see in the groove where the elbow bolts to the logs. That's all nicely polished now. Pay no attention to the carpet. I haven't got it cleaned up from the wetsanding yet.


This was my idea of an old school gearhead touch. I worked with a guy at a place called Tricked Metal emailing back and forth for two months to get her just the way I wanted. The pics don't do her justice. It's really hard to get good pics with all the reflections. The guy was just awesome to work with and the price wasn't bad at all.


When people run down to the lake to see what is making that noise, you've succeeded.

Offline Joel

  • Hero Member
  • *****
  • Posts: 1022
Re: 86 Barefoot Skier Stroker build
« Reply #13 on: February 01, 2012, 06:53:18 AM »
DA-YA-AM!!!!!   ;D   Very nice indeed!!   Now you HAVE to come to the reunion or we'll all be pissed off that we cant see your boat up close & personal...  much less get a chance to ski behind it...  I'll leave the footin' to you other guys  :)

Welcome aboard!!!

Joel
Joel - Columbus, OH - 1991 Advance

Offline backfoot100

  • Hero Member
  • *****
  • Posts: 446
  • Eddie
  • Boat Make/Model/Year: 86 Barefoot Skier
Re: 86 Barefoot Skier Stroker build
« Reply #14 on: February 01, 2012, 06:27:05 PM »
As promised here are some more pics and sound bites.

My daughter couldn't wait for the first pull after three years. My ski partner driving.


My daughter driving. She's a very good driver by the way!


This is my first pull in three years. It felt awesome! This video is taken at least 100 yds from the action. It sounds pretty good from here.


Fly by.


This is where I'm at now. I have the rubrail off as well as the combing padsand I've got the deck wetsanded. Now to buff, polish and wax. The top of the deck behind the rear seat is completely done and you can see what the finished product looks like (at least a little of the reflection). That's 200, 400, 600, 800 and 1000 wetsanding. Machine buffing with 3M marine buffing compound. Machine polishing with 3M Finesse It and finally 4 coats of Zaino non-clearcoat automotive show polish (I use it on my vehicles). I still have to remove the decals and wetsand, buff and polish the hull. If you look close, you can see how yellowed the hull is compared to the deck and you can also see the sun fading above the step of the trailer. What a huge difference it'll make when it's all done.


When people run down to the lake to see what is making that noise, you've succeeded.